Showing posts with label Furniture. Show all posts

Tuesday, July 26, 2016

Bloggers Heart Habitat: The "Extra" Room


Hey y'all! I'm SO excited to be able to write this post!

Last Fall, my good friend Charlotte of Ciburbanity asked me to participate in this amazing project idea that she had...so I, along with a group of very talented Home Decor/DIY bloggers, with the help of some amazing brands, got to fully furnish and decorate (some even helped to build it) a Habitat for Humanity Home from the ground UP!

 
Image Source: Ciburbanity

If you are not familiar with Habitat for Humanity, I urge you to get involved with your local chapter. Not only do they build homes internationally, but they also do it RIGHT here in our own backyard! They do amazing work and if you call yourself a thrifter, you NEED to visit one of their ReStores. :)

Honestly, it has just been such an incredible project to be a part of. I am overwhelmed with joy and so happy to say that last weekend was the "install" and "reveal" date for the project! We all took our tools, the amazing furniture and decor made possible by our awesome brand sponsors like Wayfair, Minted, Rugs USA, Connecticut Lighting Centers, some of our own pieces that we did, as well as the extras that were made possible through the monetary support of our friends at Hometalk, and drove to Connecticut to gussy up the amazing home that Habitat for Humanity and their group of incredible volunteers built for one very deserving and wonderful family!

Photo Credit: Ciburbanity
I live roughly about 3 and 1/2 hours from the location of the house...that said, I had a rough time getting there. You see my face in the above picture?! My body was not cooperating me with the rest of me that day. Many of you know I deal with chronic illness...so shout out to everyone that helped me that day because I couldn't have done it without your help! Also, since I was all out of sorts that day, I left my camera at home...so ALL photos (unless otherwise noted) were taken by the amazingly talented Charlotte of Ciburbanity. THANK YOU CHAR!

My main bloggin' partner in crime and I were paired up for the project. If you haven't met Lynn of Fern Avenue Blog yet, you need to go check out her blog. She's AMAZING and one of my favorite people in the world!

We were given the task of doing the "extra" room, or rather the Guest room. When I say this room is small...well, it's tiny. Though I had ideas and plans to do a lot of things in the room, in the end we decided to just go as minimalist as possible due to the small size and lack of space in the room. I think we still managed to give the family a pretty, yet functional, guest bedroom.

Lynn wasn't able to attend the install date due to a family commitment, but she DID set me up with this amazing table done in CeCe Caldwell's Smoky Mountain Gray. Make sure you visit her blog to see the details on this sweet piece! CeCe was another awesome brand that offered up free product to anyone involved in this project. D. Lawless Hardware, Old Fashioned Milk Paint Co. and General Finishes also extended the same offer to all of us! You guys ROCK and I am always so honored to represent you when I am given the honor!


She also purchased some awesome corbels at Hobby Lobby so I could make these rustic shelves for the room. I'll share more about the shelves tomorrow, here on the blog, so stay tuned!


 Since space was an issue, I knew that any detail would have to be executed OFF the ground and on the wall. I also knew that I wanted to add storage capability in the room since it was lacking in that department.

I went with some shelving in the small half closet as well as the aforementioned rustic shelves.

Closet shelving in progress (taken on my cell)
 I let the bed be the statement. It's actually a trundle bed, so if they need an extra bed at any given point, they have one under the existing bed! Full disclosure, as can happen in any home construction, some of the timelines were a little behind so the house actually had some rooms that still needed flooring to be completed. For our 'reveal' purposes, we simply staged the house, even if the floor was not down in our designated space. Ah, yes, smoke and mirrors...this blogging life is JUST smoke and mirrors, let me tell ya!


Tuft and Needle was so very kind to provide the mattresses for the bed! Here's a very amusing, (READ: embarrassing), video of me attempting, and eventually succeeding to unbox one of the mattresses over on Facebook Live. It took quite a few of us, and I promise you, it was completely user error. In other words, I had a moment and due to my crappy hands and silly nature could just not for the LIFE of me open the bag the mattress comes in. Sigh. So yeah, enjoy and PLEASE laugh. :) Also, thank you Nick for filming said debacle. It's always fun, that's for sure!


The mattresses were actually RIDICULOUSLY comfortable and SO plump! I was so exhausted that I could have totally taken a nap on them, but don't worry, I did not. 


I chose teal blue accents, with some hints of gold. It made for a calm, soothing space with just enough pops of color to make you smile upon entering it.


I wanted a modern, yet warm feel. Check out that cool cement lamp! It was such a cool (and low cost) find! (Shout-Out to my local HomeGoods in Flemington, NJ for giving me a discount upon finding out that I was shopping for a Habitat project!)

The awesome folks at Minted also contributed some prints and artwork that hadn't arrived but the pieces were awesome! They will go on the wall furthest to the right of the bed. Minted is awesome, we've worked with them before for the FFFC. Go check Minted out!


I honestly love this little nook the best! Lynn's piece fit PERFECTLY in it!


I hope you enjoyed my tiny guest room reveal! I had a BLAST doing it! Thank you again to Charlotte for letting Lynn and I participate! It was amazing!

Make sure you check out the other amazing rooms and the rest of the house from all of the below linked bloggers! They all killed it! LOVED all the rooms, but definitely my favorite was the one that Kristen of A Thrifter in Disguise did!

Her attention to detail was incredible and the little boy's sweet reaction to his new room was something I won't easily forget!

Here's some sneak peek videos I took at all of the rooms while everyone was working:
Kristen's room
Charlotte and Jillian
Stephanie and Michelle
Upstairs and Living Room Walk Through: Please note, I was really not feeling well so the brain fog was real, y'all. Again, my apologies to Kristen of a Thrifter in Disguise for completely butchering her name AND blog. sigh.

Here is a list of the bloggers, which rooms they did, and where you can find their posts!

LIVING ROOM:
Jaime from That’s My Letter
Laura from Finding Home Farms

DINING ROOM/ DECK:
Kris from Driven By Decor
Annie from Most Lovely Things

MASTER BEDROOM:
Jillian from I Am a Homemaker
Charlotte from Ciburbanity
Bee from Windgate Lane

KIDS ROOM:
Kristin from A Thrifter in Disguise

FOYER/ MUDROOM/ BATHROOMS:
Sarah and Nick from Nestrs

TEEN ROOM:
Michelle from Weekend Craft
Stephanie from Sandpaper and Glue

Thanks again to all the awesome brands that helped to make this happen, and thank you SO much, Char, for letting me be a part of this wonderful project. It was truly an honor!

Image HTML map generator

Tuesday, July 5, 2016

"Farmhouse Fun" Nightstand-July FFFC™ sponsored by OFMP

**Though I was compensated for this post in product and/or monetarily, all opinions, ideas and comments are 100% my own. Please note: this post may also contain affiliate links.**


Hey, y'all!

If you are new to these parts, welcome! A new month can only mean one thing around here...new Fab Furniture Flippin' Contest™ (FFFC)!

What's the FFFC™ you ask? Well, I'll tell you! It's a monthly sponsored contest for furniture flippin' bloggers where said bloggers compete to win a fab prize by that month's fab sponsor!

This month's sponsor is none other than The Old Fashioned Milk Paint (OFMP)!

OFMP was the original true milk paint on the market in its modern-day powder form. True milk paint has been around for centuries, though! For more on the history and for more info on what it can do, check out this post.

If you are on my little corner of the internet often, then you know it's my favorite paint ever! Since this month's theme is "Farmhouse Fun", I just KNEW I wanted to use the color Pitch Black and that I wanted to let the milk paint do what it does best: chip.


I found this piece years ago at a garage sale for a song. I knew it was just perfect for what I had in mind.

Since it had been sitting in the corner of my garage for so long, I began by giving it a REALLY good cleaning! I used my go-to product Simple Green. I decided that it was a good time for a social media PSA. :)


Seriously, the thing was disgusting. After wiping it down, I sanded where I wanted the paint to STICK. The easiest way to control how much milk paint chips is to sand away any shiny finish that may have previously been on a piece where you don't want any chipping. Milk paint was created for porous surfaces, so it will stick like no tomorrow to unfinished surfaces. When applied to a previously painted or finished surface, it will lift and chip away as it dries. Basically, the previous finish will act as a resist. If you don't want any chipping at all, you can either sand the entire piece down, or you can add some Extra-Bond to your mixed milk paint. I talk all about milk paint over on my YouTube page here. Make sure you check the video out if you want to see more tips and tricks on how to work with true milk paint.

After mixing my milk paint powder with equal parts water, I gave it a few coats of paint, waiting in between coats as they dried. I used Pitch Black, which a true black and just glorious! As expected, it chipped right where I wanted it to, along the edges and bottom where I didn't sand down while prepping my piece. I gave it some more distressing with a sanding sponge and helped the chipping along.


Once I thought it had enough distressing and happy chipping, I finished it up with some Daddy Vans All Natural Beeswax Lavender Furniture Polish which you can buy through OFMP.


The result was the perfect "Farmhouse Fun" look! To add a bit more to my piece I decided to change out the hardware to a cute ceramic bird and to decoupage some matching paper into the drawer.


I staged it with a rooster and some vintage books to enhance that farmhouse feel. I'm just smitten with this cute table!

If you're curious about that wall behind it, stay tuned. More on that later!

Check back throughout the month as our entries come in for more "Farmhouse Fun" inspiration! Good luck to all of the entrants!


Image HTML map generator

Friday, January 8, 2016

"A Fresh Start": January FFFC- Sponsored by General Finishes

**Though I was compensated in product and/or monetarily for this post, all ideas, thoughts and opinions are 100% mine!


Hey, y'all! I hope everyone had a wonderful holiday season! Also, HAPPY NEW YEAR!

It's a brand new month, but also a brand new YEAR! Yay!

New month can only mean one thing...New month of the Fab Furniture Flippin' Contest.

This month's fab sponsor is General Finishes. Yes! They are back again for a fun new month, and this time they have brought their brand new Chalk Style Paint to the party! 

Here are our fab hosts, make sure you check out all of their awesome inspiration pieces for this month's contest.


Evey of Evey's Creations (Co-Creator)
Stacy of Anastasia Vintage (Co-Creator)
Charlotte of Ciburbanity
Lynn of Fern Avenue
Carrie of Thirty Eighth Street
Colleen of 58 Water Street

I am one of the featured hosts this month, as is Stacy, and Carrie has a great project as well!

I'm excited to show you my awesome piece for this month. Our theme was "A Fresh Start". I had the perfect piece to fit it.
Here it is in all its "humble beginnings"glory.


I bought this piece for $10 off a local buy/sell/trade page on Facebook. It had some sturdy bones but had definitely seen better days.

After cleaning it up, I lightly sanded it, took the top off, then loaded up my favorite paint sprayer with some of General Finishes' Chalk Style Paint in Moroccan Yellow, some of their Enduro Extender, and got to work. As the base dried, I upholstered the top by adding foam, some batting and some fabric. It got stapled together, then put back together, and I had a lovely upholstered ottoman.


 I liked it, but thought it was missing something so I went ahead and taped off a line for a stripe.  

I used some Chalk Style Paint in Empire Grey and went ahead and added it. 


I sealed the whole thing with some of my favorite clear wax and added some finishing touches with my favorite metallic waxes. I'll be sure to explain that another day.
I can't WAIT to see what our participants submit this month! Make sure you stay tuned to see their entries, as well.


Image HTML map generator

Friday, December 18, 2015

My Family Room Update and my Shopping Trip to Cost Plus World Market!

**Though I was compensated for this post in product and/or monetarily, all opinions, ideas and comments are 100% my own**


Hey y'all! I sure do hope you Jersey Shore locals made your way over to the Cost Plus Market Grand Opening Even in Shrewsbury, NJ last week! If you didn't fear not! There's still time to head over there before Christmas, and there are still some great sales going on and if you sign up for their rewards program, you get some awesome coupons and much more!

http://www.worldmarket.com/
 I can't wait to show you my family room update, but first I want to share with you all the fun I had at the preview event some of my awesome bloggy friends and I attended before the Grand Opening at the Shrewsbury, NJ location.

Aren't we so cute?!

I had such a blast chatting and shopping with some of my old friends and a few new ones, as well. (P.S. I don't mean old in age, Denise and Kelly, I PROMISE! ::smile::) I was also very happy to finally meet some good online bloggy friends in real life!

Christmas Cheer at the Shrewsbury, NJ store!
I quickly realized, I wasn't sure what to purchase, since there was so much to choose from! Since my hubby has banned me from bringing home ANY MORE Christmas decorations, I moved along to bigger and better things.

Look at those buttons!
I saw this set and while I loved the detail, the tufting and the buttons, I knew it really didn't fit the direction I'm planning to take my family room in.

I spy Bloggers!

Then I saw it. THE. ONE. I knew it was just the couch for my family room update!

Stay tuned for more on that ottoman later!
 I will be painting the room the perfect 'greige' and ripping out that carpet. I will share it all as it happens. For now, I'm VERY excited to have the perfect sofa.


It converts to a twin sized bed, AND it lifts for storage in the base. It's the perfect sofa for a small space. Though my family room is actually quite large, my home is a bit older so it doesn't have enough closets. I plan on storing throws and blankets in my new sofa.


I love the both the lines and the texture of it. It's also super comfortable! I'm a happy girl and I'm sure my kids will appreciate not sinking into the couch while trying to watch T.V. anymore.

A HUGE thank you to World Market for hosting this fun event and for fulfilling my sofa dreams. ::giggle::


Stay tuned for more family room updates soon!

Image HTML map generator

Wednesday, December 9, 2015

My Favorites and the WINNER! ~ November FFFC


Hey y'all!

Another amazing Fab Flippin' month has passed and I'm SO excited to share my favorites as well as THE WINNER!

Thank you to Minted for sponsoring our "Take a Seat" November contest! I know our participants are all madly in love with their finished projects and the amazing fabric selection!


You can check out all of the links on our amazing featured hosts' sites Here and Here! Those inspiration projects were all sorts of amazing! :)

Now to share my FAVORITES for this month! This was sort of hard since there were so many incredible choices!

Here are my favorite projects! (Not in any order)

via Somewhat Quirky Design

This amazing settee by Somewhat Quirky Design just blew me away. I mean, JUST LOOK AT THAT PLEATED SKIRT! If you have never sewn one before, let me tell you, they are DIFFICULT to do. Karen executed the WHOLE project just so dang beautifully! Go check out the Before and After, you won't be sorry!

via D.D.'s Cottage and Design
This incredible chair by D.D.'s Cottage and Design truly proved that you sometimes, the natural way is the way to go. The lovely natural tung oiled wood with the bright and cheery fabric is all this chair needed to give it the update it needed. So pretty!

via Handmade with Ashley

Y'all know how I feel about a good build..this sweet bench is no exception. Ashley from Handmade with Ashley continues to know these builds out of the ballpark! I'm ALL about the bright colors, too! So sweet, right?!

via Vintage Rust
Deconstruction and modification are other favorites of mine. This awesome piece had an incredible transformation! She was also the entry with the most votes! Go check out it's humble beginnings over at Vintage Rust!

Which one is YOUR fave!?

I know what you really came here to see is WHO WON, though, right!?

Get ready because it's an amazing entry!

via Redo It Yourself Inspirations

ISN'T IT AMAZING!? Congrats to Robin of Redo It Yourself Inspirations really did an incredible job with this gorgeous wingback! It's just so crisp, clean and LOVELY! The fabric selection really was perfect, too. Check out that piping, too! Seriously, incredible job, Robin! CONGRATS! You are November's month! Make sure you check out her blog, all her work is equally impressive!

Once again, thank you to Minted for sponsoring November's contest. Make sure you check out their site for everything from custom printed fabric to incredible artwork and custom photo artwork, as well! I truly LOVE Minted and I know you will too!

Our lucky winner gets a $300 gift certificate to Minted's Home Decor or the Art Marketplace.

Congratulations again, Robin!

Image HTML map generator

Monday, November 16, 2015

10 Tips to Decoupaging the Perfect Image onto Furniture


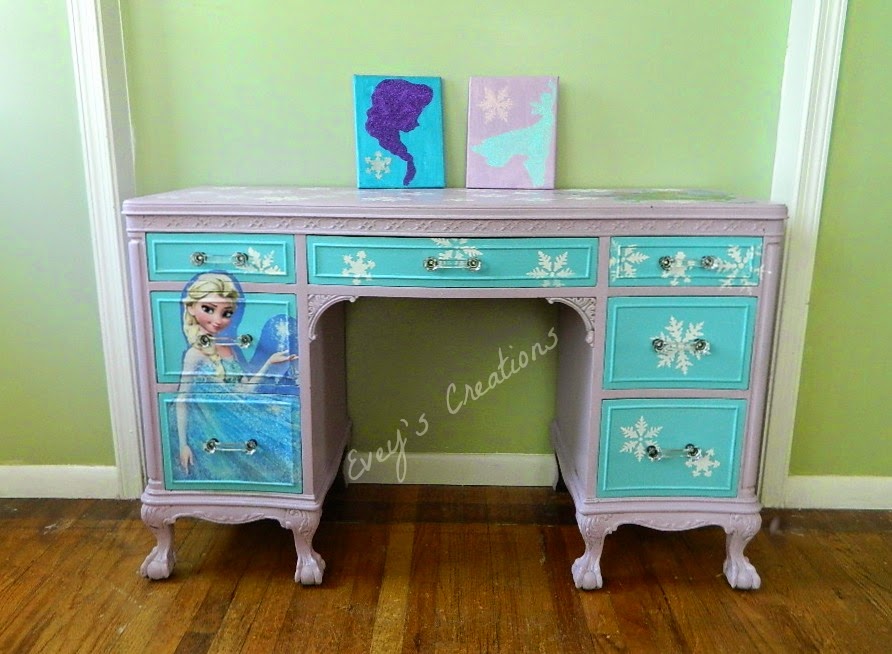
Ever wonder how to perfectly decoupage a piece of furniture? Well, you've come to the right place, grab your favorite decoupage medium and and your favorite foam brush. Here are 10 tips to Decoupaging the Perfect Image onto Furniture.


10. $5 posters from your favorite big box store are perfect for decoupaging.
9.  Line up your image where you want to decoupage it and cut with sharp scissors neatly around it to fit the area.
8. To ensure a perfect cut, especially if there are drawers or doors, use painter's tape to temporarily adhere your image to the area where you will be decoupaging and measure the spaces carefully.
7. Use a ruler and pencil make light marks where you will cut the image to allot for openings.


7. The best tool for cutting at this point, is a craft or precision cutter; do so on a cutting mat, using the ruler to make sure you have straight and perfect cuts. 
6. It's time to decoupage! Start by adding some decoupage medium to the drawer, as well as to the back of your image and makes sure you are using a foam brush.
5. It's imperative that you have a tool to smooth out any air bubbles, once you place your image down. I like to use a credit card or you can buy a roller tool meant just for this purpose.
4. The most important thing at this point is to remember to allow the decoupage medium to FULLY dry before moving on.
5. You can now add a top layer of decoupage medium. I like to wet my foam brush a bit after I dip it in the medium. Do not add too much water or you WILL get wrinkles.
4. Once again, it's very important to wait until each layer or decoupage medium is FULLY dry before proceeding onto the next layer.
3. To make sure you have a good seal, add a full 3 layers of decoupage medium over the image.
2. Make sure to seal your surface if this will be a 'high traffic' piece. Use something that won't reactivate the water based adhesive or, you guessed it, you will get wrinkles.
1. My last and most important tip is to HAVE FUN!


Please check out the full tutorial post on my blog, HERE.


Image HTML map generator

My Favorite things!

All content owned and created by

Evelin Alvarez-Flores

2009 © 2020


blog design by:
HTML Map