Showing posts with label cece caldwells paints. Show all posts

Wednesday, November 30, 2016

Home Alone 2 inspired Holiday Sign and 24 Holiday Movie Crafts and Recipes!

 Christmas Movies are the best, right?!

Y'all. I, along with some of my amazing Bloggy friends are happy to bring you, "25 Christmas Movie Crafts and Recipes"! Yup. Crafts and Recipes all inspired by our favorite Holiday movies!

 If you are following along in the Blog Hop, you are likely coming to me from Emily's blog.

My project is a sign from my FAVORITE Holiday movie EVER, "Home Alone 2, Lost in New York". I know, I know...most people don't love sequels, but THIS sequel is every bit as hilarious and wonderful as the first movie!

 **Though this post may contain sponsored material for which I was compensated in product and/or monetarily, all opinions, ideas and thoughts are 100% my own. This post also contains affiliate links, so should you choose to click over and make a purchase, I will receive a tiny portion as a commission. Also, I'll love you forever.**

I thought I'd turn my favorite quote and scene from the movie into a wooden Holiday sign so of course, I pulled out my favorite GREEN paints and stains, and my trusty Cricut Air 2!


Seriously, isn't that just the best sign EVER?! :) Here's how I did it!


I started out by taking a pine board and staining it with my favorite Stain+Finish from CeCe Caldwell's Paints in Kukui. It's important to let the stain fully dry and cure for at least 24hrs, otherwise the vinyl might not stick to the wood properly and you will get bleeding when applying the paint.
 
I uploaded a Holiday font into Cricut Design Space (font is called "I love Christmas"), then cut some vinyl out for a stencil, I used regular indoor vinyl, not permanent or outdoor vinyl.


Instead of weeding around the letters like I normally do, I weeded the letters OUT, leaving the background for the stencil. I transferred the vinyl with some transfer tape, making sure to really smooth the vinyl down onto the stained wood.

I used CeCe again, this time their chalk+clay paint in "Simply White". Make sure you use a good stencil brush and stencil in a circular motion to reduce the risk of bleeding under the stencil.


I spruced it up with some Unicorn SPiT in their new Sparkling Stains line! In person, those cute string lights just sparkle away, when the light hits the sign!

I sealed it all up with my favorite wax, Daddy Van's Clear Wax in Lavender.

I'm in love with it! Make sure you check out all of the other posts in our awesome Blog Hop!

Let's Meet The Hosts!

Marie ~ DIY Adulation | RaNesha ~ Queen Thrifty | Emily ~ The Crafty Carlson
Stephanie ~ The Tip Toe Fairy | Molly ~ Just a Little Creativity | Michelle ~ Our Crafty Mom
Vanessa ~ DIY 180 | Nicole ~ For the Love of Food | Victoria ~ Dazzle While Frazzled
Stephanie ~ A Little Moore | Sam ~ Raggedy Bits | Paula ~ Paula Tisch

There are a total of  25 talented bloggers gathered together to share with you all the wonderful crafts and recipes you can make this Christmas season, based off of some of the most beloved holiday classic films. Each blogger will lead you to the next, so be sure to finish the hop all the way through to the end for all the Christmas movie goodies!

Thanks for stopping by! Which Holiday Classic is YOUR favorite? Or are you all about the Hallmark Channel Holiday line up!?

  Image HTML map generator

Wednesday, September 7, 2016

Rustic Shelving Tutorial

**Though I was compensated for this post in product and/or monetarily, all opinions, ideas and comments are 100% my own. Please note: this post may also contain affiliate links.**


Hey y'all! I know, an actual post, FROM ME! ;)

Today, I'm sharing how I create gorgeous, rustic shelving that has a high end decor feel, for close to NOTHING cost-wise.

Photo Credits: Charlotte of Ciburbanity
If read my post on the incredible project, "Blogger's Heart Habitat" that I was so lucky to be a part of, you saw these shelves. They were in the room that Lynn of Fern Avenue and I completed for it. Charlotte was kind enough to take some photos for me!

CeCe Caldwell's Paints was one of the amazing sponsors for the project. As you know, I'm a CeCe Brand Rep, so here's my latest post for them!

Photo Credits: Charlotte of Ciburbanity
The room was tiny so I thought it best to get the decor OFF the ground and onto the walls. Shelving was the best way to achieve this!

Supplies:

-(1) One 1" x 10" x either 8ft or 10ft Pine board, cut into three even pieces (or whatever length you want your shelving to be. If the shelf is to be longer than 4ft, I would recommend you use three brackets instead of two, like I used. (My shelves were around 2ft-3ft long.)

-Cast Iron Brackets (either 8" or 10"), Lynn scored our 8" ones at Hobby Lobby while they were on sale.

-If you are not able to anchor these on studs (which is what I'd recommend) make sure you purchase drywall anchors compatible with your screws to mount these shelves safely. The iron brackets are heavy.

-CeCe Caldwell's Paints Stain+Finish in Beechnut Gray.

-Paintbrush, Sanding Sponge and level

How-To:

-Lightly sand away the factory finish on your lumber, then using a brush stain your shelves always following the grain of the wood. Since CeCe's Stain+Finish is just that, a Stain PLUS a Finish, you don't need to worry about adding extra protection to the shelves. (For high-traffic areas though, I do recommend a couple of extra coats of their "Endurance" to make sure your finish stays safe.) The amazing Gray color gives this new pine wood and old, worn look!

-Mount your brackets safely onto the lumber itself, then mount the whole unit safely onto either the drywall (using the anchors) or onto the studs.

-Make sure you are hanging them straight using a level.

-STYLE!

Total Project Cost was less than $35!
Here's the Facebook Live Video I did from the Habitat House showing you how to stain the shelves!


Staining some shelves using CeCe Caldwell's Paints Stain + Finish in Beechnut Gray for the Habitat house! #ad
Posted by Evey's Creations on Saturday, July 16, 2016
Photo Credit: Charlotte of Ciburbanity
I loved these shelves so much, that I will be replicating them in my own home for my family room redo!

Thanks to CeCe for another awesome month of DIY'ing GREEN! To find my other 'CeCe Brand Rep' posts, just search "CeCe Caldwell's Paints" in the search bar and they should all pop RIGHT up!

Image HTML map generator


Tuesday, July 26, 2016

Bloggers Heart Habitat: The "Extra" Room


Hey y'all! I'm SO excited to be able to write this post!

Last Fall, my good friend Charlotte of Ciburbanity asked me to participate in this amazing project idea that she had...so I, along with a group of very talented Home Decor/DIY bloggers, with the help of some amazing brands, got to fully furnish and decorate (some even helped to build it) a Habitat for Humanity Home from the ground UP!

 
Image Source: Ciburbanity

If you are not familiar with Habitat for Humanity, I urge you to get involved with your local chapter. Not only do they build homes internationally, but they also do it RIGHT here in our own backyard! They do amazing work and if you call yourself a thrifter, you NEED to visit one of their ReStores. :)

Honestly, it has just been such an incredible project to be a part of. I am overwhelmed with joy and so happy to say that last weekend was the "install" and "reveal" date for the project! We all took our tools, the amazing furniture and decor made possible by our awesome brand sponsors like Wayfair, Minted, Rugs USA, Connecticut Lighting Centers, some of our own pieces that we did, as well as the extras that were made possible through the monetary support of our friends at Hometalk, and drove to Connecticut to gussy up the amazing home that Habitat for Humanity and their group of incredible volunteers built for one very deserving and wonderful family!

Photo Credit: Ciburbanity
I live roughly about 3 and 1/2 hours from the location of the house...that said, I had a rough time getting there. You see my face in the above picture?! My body was not cooperating me with the rest of me that day. Many of you know I deal with chronic illness...so shout out to everyone that helped me that day because I couldn't have done it without your help! Also, since I was all out of sorts that day, I left my camera at home...so ALL photos (unless otherwise noted) were taken by the amazingly talented Charlotte of Ciburbanity. THANK YOU CHAR!

My main bloggin' partner in crime and I were paired up for the project. If you haven't met Lynn of Fern Avenue Blog yet, you need to go check out her blog. She's AMAZING and one of my favorite people in the world!

We were given the task of doing the "extra" room, or rather the Guest room. When I say this room is small...well, it's tiny. Though I had ideas and plans to do a lot of things in the room, in the end we decided to just go as minimalist as possible due to the small size and lack of space in the room. I think we still managed to give the family a pretty, yet functional, guest bedroom.

Lynn wasn't able to attend the install date due to a family commitment, but she DID set me up with this amazing table done in CeCe Caldwell's Smoky Mountain Gray. Make sure you visit her blog to see the details on this sweet piece! CeCe was another awesome brand that offered up free product to anyone involved in this project. D. Lawless Hardware, Old Fashioned Milk Paint Co. and General Finishes also extended the same offer to all of us! You guys ROCK and I am always so honored to represent you when I am given the honor!


She also purchased some awesome corbels at Hobby Lobby so I could make these rustic shelves for the room. I'll share more about the shelves tomorrow, here on the blog, so stay tuned!


 Since space was an issue, I knew that any detail would have to be executed OFF the ground and on the wall. I also knew that I wanted to add storage capability in the room since it was lacking in that department.

I went with some shelving in the small half closet as well as the aforementioned rustic shelves.

Closet shelving in progress (taken on my cell)
 I let the bed be the statement. It's actually a trundle bed, so if they need an extra bed at any given point, they have one under the existing bed! Full disclosure, as can happen in any home construction, some of the timelines were a little behind so the house actually had some rooms that still needed flooring to be completed. For our 'reveal' purposes, we simply staged the house, even if the floor was not down in our designated space. Ah, yes, smoke and mirrors...this blogging life is JUST smoke and mirrors, let me tell ya!


Tuft and Needle was so very kind to provide the mattresses for the bed! Here's a very amusing, (READ: embarrassing), video of me attempting, and eventually succeeding to unbox one of the mattresses over on Facebook Live. It took quite a few of us, and I promise you, it was completely user error. In other words, I had a moment and due to my crappy hands and silly nature could just not for the LIFE of me open the bag the mattress comes in. Sigh. So yeah, enjoy and PLEASE laugh. :) Also, thank you Nick for filming said debacle. It's always fun, that's for sure!


The mattresses were actually RIDICULOUSLY comfortable and SO plump! I was so exhausted that I could have totally taken a nap on them, but don't worry, I did not. 


I chose teal blue accents, with some hints of gold. It made for a calm, soothing space with just enough pops of color to make you smile upon entering it.


I wanted a modern, yet warm feel. Check out that cool cement lamp! It was such a cool (and low cost) find! (Shout-Out to my local HomeGoods in Flemington, NJ for giving me a discount upon finding out that I was shopping for a Habitat project!)

The awesome folks at Minted also contributed some prints and artwork that hadn't arrived but the pieces were awesome! They will go on the wall furthest to the right of the bed. Minted is awesome, we've worked with them before for the FFFC. Go check Minted out!


I honestly love this little nook the best! Lynn's piece fit PERFECTLY in it!


I hope you enjoyed my tiny guest room reveal! I had a BLAST doing it! Thank you again to Charlotte for letting Lynn and I participate! It was amazing!

Make sure you check out the other amazing rooms and the rest of the house from all of the below linked bloggers! They all killed it! LOVED all the rooms, but definitely my favorite was the one that Kristen of A Thrifter in Disguise did!

Her attention to detail was incredible and the little boy's sweet reaction to his new room was something I won't easily forget!

Here's some sneak peek videos I took at all of the rooms while everyone was working:
Kristen's room
Charlotte and Jillian
Stephanie and Michelle
Upstairs and Living Room Walk Through: Please note, I was really not feeling well so the brain fog was real, y'all. Again, my apologies to Kristen of a Thrifter in Disguise for completely butchering her name AND blog. sigh.

Here is a list of the bloggers, which rooms they did, and where you can find their posts!

LIVING ROOM:
Jaime from That’s My Letter
Laura from Finding Home Farms

DINING ROOM/ DECK:
Kris from Driven By Decor
Annie from Most Lovely Things

MASTER BEDROOM:
Jillian from I Am a Homemaker
Charlotte from Ciburbanity
Bee from Windgate Lane

KIDS ROOM:
Kristin from A Thrifter in Disguise

FOYER/ MUDROOM/ BATHROOMS:
Sarah and Nick from Nestrs

TEEN ROOM:
Michelle from Weekend Craft
Stephanie from Sandpaper and Glue

Thanks again to all the awesome brands that helped to make this happen, and thank you SO much, Char, for letting me be a part of this wonderful project. It was truly an honor!
Image HTML map generator

Wednesday, April 13, 2016

Heart String Art Tutorial (with video)

**Though this post contains sponsored content for which I was compensated monetarily and/or in product, all ideas, opinions and thoughts are 100% my own. This post may also contain affiliate links.**


Hi y'all!

I'm back for another CeCe Brand Rep Project! I truly love these products and if you follow along via social or any of the Facebook paint and DIY groups I belong to, you may have seen some snippets of this project back in February around Valentine's Day. I had the honor of hosting a workshop with a version of this project for the Make it Take it Station at the Philly Home Show.

Here's what you will need for this cute artwork project:


Supply List:

- A decent and heavy enough (but not so heavy that you can't properly handle it) hammer
- Scrapwood or a pine board cut to about 12x12 size
- Foam brush
- Twine or String
- 1/4 in. Wire Nails
- Sanding Sponge
- CeCe Caldwell's Stain+Finish in Beechnut Gray

Instructions:

Sand your board with your sanding sponge in order to remove the factory finish on it. Apply the Stain+Finish with the foam brush, always staining in the direction of the wood grain, never against it. You don't want to overload your brush, offload onto a paper towel if you think you have too much. Apply one coat for a slight weathered wood look, two coats for a deeper gray stain. Wait in between coats for stain to fully dry.

Next using a template that is taped down to your board, score the wood by taking one nail and lightly hitting it with the hammer to make one indent into the wood at a time, about 1/2 inch apart all the way around.I simply created a heart template using clipart in Word and fit it to the full page (8 1/2"x11") then printed it out. Once your board is scored, hammer a nail into each indent. Make sure to hit the nailhead dead on, and straight down about halfway into the board.

Once all your nails are in, begin to string. Tie off the string with a double know at your starting point. To create an outline you must go around each nail following your shape. Then you can string in a diagonal manner or in whichever way you decide to.

You can see how I did this in the video below.


For the record, the top of the buffet that my string art is sitting on was also done in CeCe's Stain+Finish! I used my two favorite colors for the top of that piece, Kukui and Walnut Grove!

Thanks for stopping by! See you soon with more crafty fun!

Image HTML map generator

Wednesday, February 10, 2016

Philly Home Show Presentation and Make It Take It Station!

**Though I was compensated in product and/or monetarily for this post, all ideas, thoughts and opinions are 100% mine!


Hey y'all!

Come on out and join me at the Philly Home Show in Center City, Philly this weekend at the Philadelphia Convention Center.

I'll be doing a presentation on "How to DIY Green" and will feature several of my favorite brands including The Old Fashioned Milk Paint Co., Cece Caldwell's Paints, Unicorn SPiT, and Daddy Vans Waxes. I'll even be giving some free product away!

Learn how to flip your kitchen or just a small piece of furniture all while being safe, non-toxic and truly green.

Before 

AFTER
Using CeCe Caldwell's Paints Stain + Finish 

Also make sure you check out the awesome Make It Take It Station and join in on the FREE crafting led by some of the areas best and brightest  (including myself, of course!).
 

I'll be hosting two workshops this time around! 

Join me for some Clock Making and Wood Burning Fun sponsored by Walnut Hollow and Unicorn SPiT.  Then learn how to make some Valentine's Day-inspired String Art brought to you by The Old Fashioned Milk Paint Co. and CeCe Caldwell's Paints. 

Sneak Peek at the fun!

Can't wait to see you all there!

Thanks to Home and Garden Events for the honor of presenting and to all of my sponsors for making it happen ! 
Image HTML map generator

Wednesday, January 13, 2016

Philly Home+Garden Show Stage Presentation and Make and Take Station


Hey y'all!

Just wanted to drop in to let you guys know that I will be presenting on the Main Stage as well as hosting a Make and Take this weekend at the Philly Home+Garden Show at the OAKS Expo Center in King of Prussia, PA! If you are local to the Tri-State area, we'd LOVE to have you!

You can check out the Make and Take Schedules here.

Please, come out and craft with me at the Make and Take Station on Saturday at Noon!

We will be making some DIY Faux-Driftwood String Art!


Here's some String Art I did for the blog a few years ago. It's still my son's favorite piece of artwork in his room.

DIY Nautical String Art

Check out the Stage Schedule here and make sure you check out all of the amazing speakers and celebrities (including HGTV's Jonathan and Drew Scott!) that will be presenting.

I will be presenting at 4pm on Saturday, Jan. 16th! My topic will be "Green DIY and Green Cleaning/Prep Tips". Learn all about the best 'green' products on the market for all you cleaning and DIY needs, including refinishing everything from a rescued piece of furniture to your kitchen cabinets and bathroom vanities!

Milk Painted Buffet
Bathroom Vanity Makeover
I will be featuring some of my favorite products, including The Old Fashioned Milk Paint Co., CeCe Caldwell's Paints and many more!

As part of my presentation, I will be raffling off some AMAZING products, and the Make and Take will feature OFMP! You will get to try great products and even keep some of it. All the Make and Take Stations are completely FREE with your entrance to the Home Show and you will be able to craft and take your craft home with you!

So make sure you don't miss it!
  Image HTML map generator

Thursday, December 10, 2015

Evey's 12 Days of Christmas Giveaways- Day 2!


Hey y'all! It's Day 2 of my 12 Days of Christmas Giveaways! YAY! You can go see Day 1 and enter here.

I'm super psyched to share today's giveaway with you! It's one of my favorite brands and full disclosure, I am a rep for them! I don't sell their products, though I must admit I've toyed with the idea, because it's just THAT GOOD! Guess who!?


If you guessed CeCe Caldwell's Paints, then you were RIGHT!

Here are some of the pieces I've done in their incredible products:

Rocking Chair Redo
The above Rocking Chair was finished off using their incredible line of metallic waxes, as well as with their Clear Waxing Cream. I'm actually quite obsessed with their waxes and use them on almost everything! You can check out a couple videos I've done featuring their awesome stuff here and here.

"Inspired by Mom" Rocking Chair Redo

Did you know that you can also update your bathroom with their awesome paint and finishes? Well you can! Here's a sneak peek at a client bathroom I recently did in a custom blend of their paints.

Bathroom Vanity Redo

Now for the fun part...here's what they're offering up:

-->2 Quarts of Paint, 1 Half Liter Finish, 1 Metallic Wax, 1 Stain+Finish, Brush, and Apron
Yes, ALL of that! THANK YOU CECE AND LAUREN!

Now, the rules for the giveaways. Please enter below via Rafflecopter widgets, and one winner will be chosen at random via Rafflecopter in one week. The winner(s) will then be notified via email and the name will also be visible here in THIS post. Please respond to the email (vendor) with your information within 48 hours of the announcement, or else someone else will be chosen. It is up to YOU to contact the vendor to claim your prize. You can earn entries by following the instructions in Rafflecopter, some are optional extra entries, some are mandatory. Thank you and good luck!

a Rafflecopter giveaway
Image HTML map generator

Friday, August 14, 2015

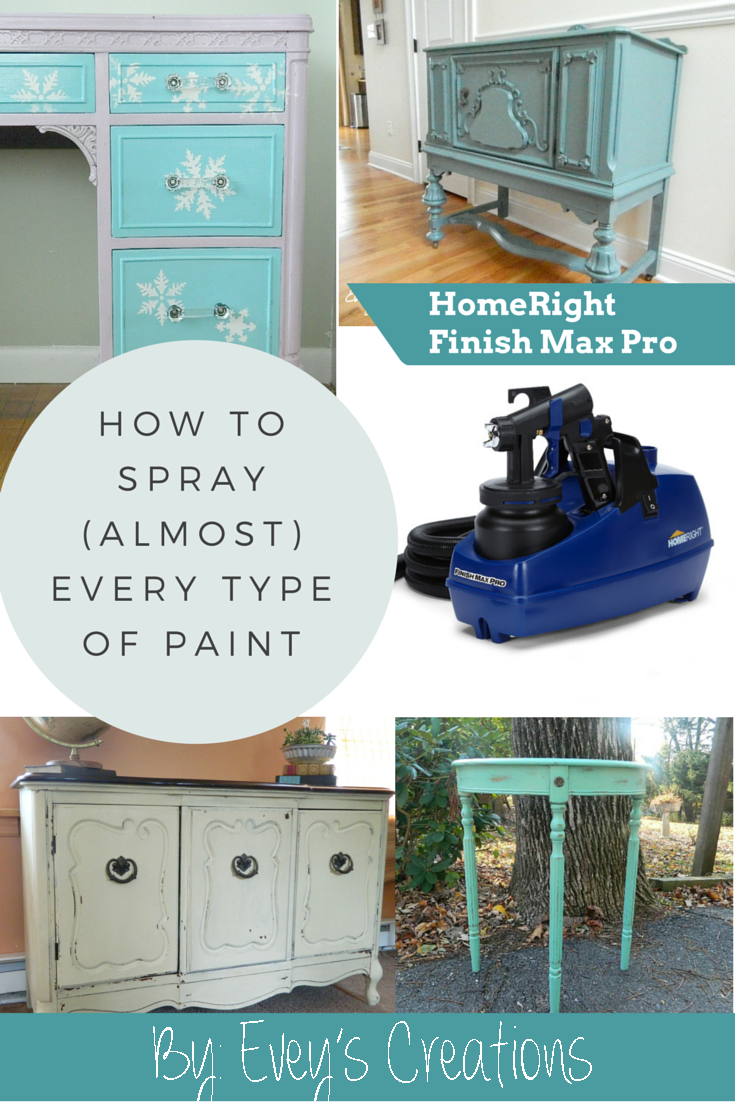
How to spray (almost) every brand/type of paint on the market (with the HomeRight Finish Max Pro)!

**This post contains sponsored content. Though I was compensated monetarily and/or with product, all ideas and opinions are 100% my own!**
 
Hey y'all!

You guys know how I feel about my HomeRight Finish Max Pro. (**Update: I now have the Finish Max as my Pro finally bit the dust since I used it so often and had it for so long! I'm loving the Finish Max, as well!!!!**) This compact baby packs a powerful punch! I spray everything from true milk paints, to acrylic based paints (both chalky finish and not), even mineral based paints! How, you ask!? Well, my friends, you have come to the right place!


Here is how to properly dilute and prep many different types of paint in order to spray them!

1. My favorite type of paint, and perhaps the easiest to spray is good Old Fashioned Milk Paint. (Yes, that is the brand I use, but this works for all types of milk paints, as long as they're the real deal.)

http://sweetsongbird.eveyscreations.com/2015/06/shabby-chic-storage-milk-painted.html
Shabby Chic Storage: A Milk Painted Buffet
 When you are spraying a true milk paint without the bonding agent, all you need to do is make it a tiny bit runnier than you usually do when mixing. Instead of mixing equal parts water (distilled or bottled works best) and milk paint powder, add a tiny bit more water than powder. I would calculate it to be one part powder to one and a quarter part water. Test with your viscosity cup and consult with your sprayer's manual to ensure that the paint is running through it accordingly. For the HomeRight Sprayer, I've found the optimum run-out time to be somewhere around 30 seconds.

If you are going to be adding your bonding agent for the non-chippy look, all of the above changes.  The acrylic bonding agent is mixed in after the paint is mixed. It is usually equal parts bonding agent to equal parts mixed milk paint. This means the paint now acts a lot like acrylic paint. Therefore, it needs to be thinned out the same way an acrylic paint would be thinned out.

Which brings me to my next point:


http://sweetsongbird.eveyscreations.com/2015/03/frozen-inspired-vanity-redodecoupage.html
Frozen-Inspired Vanity

2. Acrylic Paint: Here's the thing, when it comes to acrylic paint, you have quite a few options.

For thinning out the TRUE milk paint with added acrylic binder, you need to add some acrylic extender into the mix. I have found my formula (again, I use OFMP, as well as their Extra-Bond) to be 1 part MIXED paint WITH acrylic binder to a little under a 1/2 part Acrylic Extender. You want the viscocity cup run-out time to be somewhere around 25-30 seconds. Any thicker and you will have a gooey mess.

For thinning out Chalky Finish Acrylic paints, (such as DecoArt's Americana Decor line) you will also need to use an acrylic extender. Some people will tell you to use water since technically the paints are water based and with an acrylic (polymer) binder, but please bear with me because I'm about to get really nerdy on you. ::smile::

An acrylic extender does just what it says, extends. It extends the drying time, thins, and when you are using it with a brush, it reduces brush strokes. While water will, for the most part, work fine, I prefer using the extender because it works 100% percent of the time. Your paint won't seize up on you, and you will have a better working time, which equals a nice and clog-free paint sprayer nozzle. Why? That's simple, it's chemistry. The emollient and humectant in the extender work together to keep your paint (yup, you guessed it) smooth and wet. This comes in extra handy when you add air and a spray nozzle. Keep in mind, this also extends your drying time, but not having to brush the paint on your piece, is totally worth it!

Here's a secret: this is the same way I thin out ASCP. I won't get into details, but believe me when I tell you it works.

You want the run-out time to be somewhere around 35 seconds. 

Painted in a General Finishes Custom Color Blend

For Non-Chalky Finish Acrylic (Traditional) Paints, such as General Finishes, also use an acrylic extender. You won't need to add as much though, as they are general smoother than their chalky finish counterparts.

Now on to another set of polymers:

3. Latex and Enamel paint: Again, you can use plain old water, but it won't always work out the way it should. I like to use both water AND (sometimes OR) a flow medium like Floetrol to thin out latex paint. Keep in mind, many 'latex' paints on the market are not 'latex' at all, but rather enamel or acrylic, make sure you know the difference. Latex and enamel paint usually requires around 10% thinning in order to be sprayable. The viscosity run-out time should be similar to an acrylic, on average around 35 seconds. I use around four parts water to one part Floetrol for my latex or enamel paint. Keep in mind, you only need to thin it out around 10%. Yes, I'm forcing you to do math.

 4. Mineral, Water-based paints: A true mineral paint, that contains no polymers, (such as CeCe Caldwell's Chalk+Clay Paints) only needs water to thin it out. I hardly spray this type of paint, but have done so successfully.

Done in Custom Color Blend with CeCe Caldwell's Paints


You need a run-out time of around 40 seconds for it to truly flow out properly and not clog your nozzle. Add water until you see that happen with your viscosity cup. Don't add too much though, or you will have adherence issues.

5. Stains and Topcoats: To spray traditional oil or water based stains (NOT Gel Stains), you don't need to do any thinning. Just have at it. The same goes for a Polycrylic or a Polyeurethane...just spray away. For an oil-based VARNISH, though, you WILL have to thin. I usually use mineral spirits, but you can also use Turpentine. Follow the instructions on your sprayer and using your viscosity cup, thin accordingly. For the HomeRight Finish Max Pro, this will mean thinning out to an average run-out time of around 35 seconds (20-45 seconds).

Last thoughts, please make sure you STIR your thinners and solvents into your paint and stain, and do not shake the cans, so as to prevent air bubbles when spraying. Also, you might want to strain your old paint or stain in order to prevent any clumps from making their way into your spray nozzle.

I hope this helped you guys! As always, thanks for checking us out! If you have any questions, leave them in the comments section and I will try to answer them to the best of my ability!


Image HTML map generator

My Favorite things!

All content owned and created by

Evelin Alvarez-Flores

2009 © 2020


blog design by:
HTML Map