Showing posts with label Guest Post. Show all posts

Thursday, May 9, 2013

Woohoo! Mary Beth is here today! Lemon Cheesecake Pie Recipe

I'm so excited to be guest posting today for Evey here at Sweet Song Bird.
I'm Mary Beth from Cupcakes and Crinoline where I blog about all things home ~ cooking, baking, crafting, homemaking and just about anything that strikes my fancy. I live in the the Northeast with my husband, three boys and one sweet dog.

Today I'm sharing a super easy and delicious recipe for Lemon Cheesecake Pie.

Ingredients:
1 pre-made 9" graham cracker pie crust
1/2 cup cream cheese at room temperature  
1 14-ounce can sweetened condensed milk  
2 egg yolks  
2/3 cup lemon juice

Method:
Preheat oven to 325 degrees F. In a medium bowl cream together cream cheese and condensed milk until there are no lumps. Add egg yolk and lemon juice mixing until well blended. Pour filing into pie crust. Bake for approximately 23 minutes until filling is set. Cool completely on wire rack. Refrigerate until well chilled-several hours or overnight. Before serving add some fresh whipped cream is desired.

Now, isn't that easy?
A big thank you to Evey for letting me visit today.
If you would like to say hi, you can visit me on my blog, Cupcakes and Crinoline, or connect with me on facebook, twitter or pinterest.


Thursday, April 18, 2013

Natalie from NorthShore Days is at it again! Bracelet Tutorial


Hey Everyone,
It's Natalie from NorthShore Days again, I'm so happy to be here while Evey is away this week.


Today I want to share an oldie but a goodie. I made this painted bracelet way back in January and I think you'll all enjoy it too - it is still one of my favorite additions to my collection....

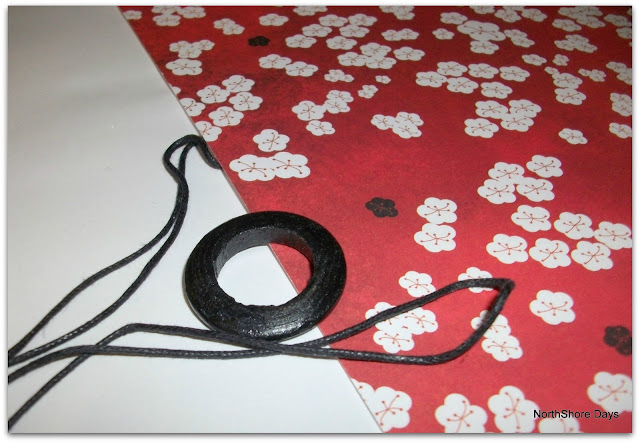
I picked up a packet of these wooden rounds at Spotlight whilst shopping for something else and figured I might be able to do something with them....

I also used waxed thread, black paint, scrapbook paper, a couple of beads,clasps and jump rings...

I painted the wooden round black and matched it up with the black thread..... 

How cute is this scrapbooking paper?? 
Its "Hana" from the Sakura Park Collection by KaiserCraft. 
I loved that I could cut out the little flowers and they would fit perfectly.

 I modged the flowers on and coated with Satin Varnish. 

This is how I put it together - but again the options are endless...

Seriously.... is it not adorable??? 


And so easy to make!
I hope you all enjoyed my post. Thanks  for having me,
Take care
xxx


Photobucket


Thursday, March 28, 2013

Natalie from "NorthShore Days" take two!- Bracelet Tutorial

Hi y'all! We loved having her over so much, that we asked her over again! ;) Please welcome Natalie again!  Today she's sharing a sweet bracelet tutorial!

 Enjoy!

Hello Everyone,
If you haven't met me before, I'm Natalie and I blog over at NorthShore Days where I share tutorials, crafts, DIY and funny stories about my family. I love white decor and anything beachy, and I’m lucky enough to live very near to the beach on the beautiful North Shore of Auckland, New Zealand. 

I’m so happy to be here at Sweet Song Bird for Evey while she is recovering.


 My passion is jewelry making.... I love to share my ideas and easy tutorials with everyone... so I'm going to show you how to make a super cute easy wrap bracelet today. 


What you will need: 

 memory wire, lobster clasps, chain, and beads (maybe a couple of charms too).

 What to do: 

 1. Cut 2, half lengths of memory wire and loop one end.
2. Before closing the loop, slip on the chain, then tighten to close. 3. Add beads and end off with another loop. Measure the chain so that the bracelet sits comfortably on your wrist. Remove the links you don't need and add the lobster clasp. 
  Make a second bracelet in the same way.

 Now you have 2 bracelets you can wear independently or mix up with others or you can make them into a wrap bracelet... If you want to add charms along the way - go for it..
To complete the Wrap Bracelet  
Following the pictures below - criss-cross the chain to attach from one bracelet to the other. 
When taking the bracelet off, undo 1 clasp. The next time you wear it, just wind the bracelet onto your arm. 

So, so easy! 

 
Of course you can use any combination of beads to achieve the look you want - the sky is your limit! 

Cute right? 


I hope you enjoyed the tutorial and maybe been inspired to create an item of jewelry too. 
Don't forget to pop on by my blog and say hi, or visit me on Facebook.

 Thanks for having me….

Take care 

xxx

Photobucket

Tuesday, March 26, 2013

Natalie from "NorthShore Days" visits!- Beachy Tins Tutorial

Hi y'all! Today, I'm happy to introduce you to a wonderfully sweet friend of mine named Natalie!  She has a heart of gold and makes LOVELY jewelry!  Please make sure you follow her blog and check out her store!
 
Hey Everyone,
I'm Natalie and I blog over at NorthShore Days where I share tutorials, crafts and DIY.  I love white and everything beachy, and I’m so lucky to live very close to the beach on the beautiful North Shore of Auckland, New Zealand.


I’m really happy to be here at Sweet Song Bird for Evey while she is recovering.


Today I want to share a really quick little project with you. If you know me - you know I love tin cans, seriously, there are so many things you can do with them!
This project was inspired by some distressed tin cans by Shannon from Fox Hollow Cottage. Its such a simple project. I painted clean tins and when dry I sanded them gently  so some tin showed through. Then I embellished them with what I had on hand in my craft drawer. I wrapped twine around the tin and securely. Then added some cute beachy charms that I threaded onto clear nylon thread and wound over the twine.   

Ta-daaa - how cute are they? 

 Sitting on my window sill, they brighten up the kitchen with their happy colours.


I love the colours of these petals, they complement the blue so beautifully....


Thank you so much for having me Evey,

Take care

xxx 

Photobucket

Monday, March 25, 2013

Dee from "DeeConstructed Design" Visits!

Today, we welcome Dee from DeeConstructed. :) She's pretty awesome. Make sure subscribe to her feed and follow her on Facebook!

Enjoy!

When Evey asked me to put something together for a cameo appearance on Sweet Songbird, I drew a blank. Over in my corner of the interweb, I chatter about rehoming curbside furniture or cutting apart expensive artwork. Sometimes, I post long-winded sentimental blurbs about days gone by but you won't find a single, solitary recipe anywhere on my blog. Nope, to me the kitchen's sole purpose is to mix up color concoctions and hose off paintbrushes. So yeah, how this chick and I became friends is a mystery to me too. Nonetheless, I couldn't leave her stranded so I searched the archives (a.k.a. meeeeellions of unedited photos) and remembered a project I whipped up for a girlfriend a few months back. Jenny and I used to be neighbors. Her daughter, Natalie, took a liking to me way back when My Littlest Pet Shop was all the rage (is it still??) and we bonded over the super cute pups in the lineup. At some point this little girl sprouted up and was all ready for her 'not a girl, not yet a woman' teen bedroom makeover. Since I'm really good at annoying reminding my friends of my thrifty decorating sense (and penchant for power tools) she asked if I could work my magic to create a message center a la Pottery Barn Teen. Apparently, Nat had been drooling over their Blue Bubble Dottie Style Tile Set but the $300+ price tag made Jenny gag. Since she already had (4) style tiles I had a head start on the project. The two cork boards were covered in batting and fabric and the two whiteboards got a new coat of chalkboard paint. PBT Knock Off
 I know I'm not exactly blazing home decor trails here, people, and that all over DIY-land folks have ventured down this path before me. (yawn) But the vast majority of them conveniently scaled their projects down to fit ready-made frames. I did not have that luxury and I had a rep to protect. Challenge accepted. Anytime I spy baseboard molding on sale I scoop it up. I checked my stock and found some with an attractive profile in 48" lengths. After building a box from 1" x 2"s for the tiles to nest in, I measured and mitered the molding. PBT Knock Off
If you follow my blog you already know I take plenty of shortcuts. Some prove hazardous but most save a lot of time and frustration and usually have something to do with getting out of doing math. Here's my stupid simple solution for mitering 45 degree angles. PBT Knock Off Hopefully that makes sense. Feel free to pin that baby for future reference. Now a close up for the mobile folks...

 PBT Knock Off
 I always draw the arrows in the direction I want to cut. It's amazing how confused you can get walking from the kitchen into the garage. Plus, if you have someone else cutting your wood you just saved a good 15 mins of arguing about who screwed up what. After all the cuts were made, I glued up the corners and smacked in some staples for good measure... PBT Knock Off
...before securing the frame to the box with a few more 'l' brackets. Then the square tiles were installed and I added a couple horizontal 1" x 3"s for additional support. The whole piece got painted white before I added some  d-ring hangers.
 PBT Knock Off
Overall, this piece measured 4' x 4'. Yowza! And it was heavy. I made sure to tell Jenny to find at least one stud to screw in to since I wasn't about to be responsible for any broken toes. PBT Knock Off

So what do you think? Not bad for under $20 huh? Take that Pottery Barn! And because I know how finicky teen girls can be the entire piece can be disassembled and used separately in the future. Thanks for following along and thank you for having me Evey! ~Dee

Saturday, March 23, 2013

Mary Beth from "Cupcakes and Crinoline" Visits- Cinnamon Roll French Toast Recipe

Hi, y'all!  Today we are happy to welcome my sweet friend Mary Beth from "Cupcakes and Crinoline"!  She is always whipping up something delicious and today is no exception!

Enjoy!

Hi everyone ~ I'm Mary Beth from Cupcakes and Crinoline and I am thrilled to be visiting here at Sweet Song Bird. A big thank you to Evey and Erika! I really enjoy making breakfast on the weekends for my guys but sometimes I run out of ideas for things to make. You know how it is. You want to make something tasty and hearty but you've made the same few things over and over for months on end and then {YIPPEE} you find an awesome new recipe that you give a try and it turns out even better than you expected.
That's what happened this weekend. I bought a big box of Pillsbury Cinnamon Rolls at Sam's Club and found this recipe on the back ~ I am so glad I made it. I changed the recipe up just slightly from the original omitting nuts and some additional syrup and powdered sugar.
Recipe:
1/4 cup butter or margarine melted
2 cans Pillsbury refrigerated flaky cinnamon rolls with butter cream icing
6 eggs
1 teaspoon ground cinnamon
2 teaspoons vanilla
1 cup maple syrup
1/2 cup whipping cream Garnish Icing from cinnamon roll package

Directions: Heat oven to 375 degrees. Pour melted butter into ungreased 13x9-inch glass baking dish. Separate each can of dough into 8 rolls; set icing aside. Cut each roll into 8 pieces, place pieces over butter in dish. In medium bowl with wire whisk, beat eggs. Beat in cream, cinnamon and vanilla until well blended. Gently pour over roll pieces. Drizzle with 1 cup syrup. Bake uncovered 20 to 28 minutes or until golden brown. Cool 15 minutes. Meanwhile, remove covers from icing; microwave on Medium (50%) power for 10 to 15 seconds or until drizzling consistency. Drizzle icing over top.

Cinnamon Roll French Toast11 So there you have it! This would be perfect for Easter morning or anytime you have guests over. It looks and tastes like you slaved away for hours and it took less than an hour from start to finish! I would love to get to know you better ~ stop by Cupcakes and Crinoline any time where I blog about recipes, crafts, and home life with my three boys or connect with me on Facebook, Twitter, G+ and Pinterest  

Friday, March 22, 2013

GF Fridays: Taryn from "DD+D" visits!- GF Shortbread Cookie Recipe


Hi y'all! Welcome to another edition of Gluten-Free Fridays! Today, we have the pleasure of having Taryn from Design, Dining + Diapers! Please help me welcome her and make sure you check out her incredible blog!

Enjoy!


Hi All! I'm Taryn from Design, Dining + Diapers and I'm very happy to be here today sharing a gluten-free recipe! This one is SUPER easy but SO delicious! I love my morning time with my 2 year old daughter. It consists of us snuggling on the couch together under the same blanket while she drinks her milk and I drink my cup of coffee. It's perfect. I cherish those moments. But just when I thought my morning cup of coffee couldn't get any better, THESE little cookies came along... Gluten-Free Shortbread Cookies Dipped in Chocolate and Peanuts. Gluten-Free Chocolate Dipped Shortbread Cookies I like to think of them as faux-biscotti because they taste just like biscotti (but a little softer) and dipping them in my coffee just made my morning that much better. But technically since they aren't 'baked twice' they aren't considered the real deal. But who is counting? Gluten-Free Chocolate Dipped Shortbread Cookies
 These little cookies are about 1.5"X3" of pure goodness. The soft crumbly cookie, sweet chocolate and crunchy topping are the perfect combo. Gluten-Free Chocolate Dipped Shortbread Cookies
These would make a great addition to your morning cup of coffee, served with ice cream or a nice bite size dessert following a dinner party.
Chocolate Dipped Shortbread Cookies (Gluten-Free)
Recipe Type: Dessert
Author: Taryn
Prep time: 30 mins
Cook time: 12 mins
Total time: 42 mins
Serves: 36 Cookies
Ingredients
  • Bob’s Red Mill Gluten-Free Shortbread Cookie Mix
  • 1 tsp Egg Replacer + 2 Tbsp water (or 1 egg yolk)
  • 1 1/2 Sticks of Butter
  • 2 Tbsp Water
  • 1 Cup Chopped Nuts
  • 8 Oz. Melting Chocolate
Instructions
  1. Make the Shortbread Cookies according to the Bob’s Red Mill Package which includes 1 1/2 sticks of butter and 1 large egg yolk (or egg replacer).
  2. Beat or in a food processor combine the ingredients until the dough is crumbly (but will stay together when squeezed between your fingers).
  3. Separate the dough in half.
  4. Form half of the dough into a ball and roll it out onto a clean surface until it is about 1/4" thick. Use GF flour to keep it from sticking.
  5. Use a rectangular cookie cutter to cut out the cookies.
  6. Pick up the dough scraps, form a new ball and roll out again.
  7. Repeat process until all of the dough is used.
  8. Place the cookies on an ungreased cookie sheet and bake for 12-15 minutes at 375 or until golden brown.
  9. While the cookies are cooling, melt the chocolate in a double broiler and place chopped nuts into a bowl.
  10. Take each cookie and dip it in the chocolate, then into the chopped nuts, and place it on a cookie sheet lined with freezer paper.
  11. When the tray is full, place it in the freezer for 10-15 minutes to harden the chocolate.
  12. Repeat until all cookies have been dipped.
What do you enjoy with your morning cup of coffee? You can also view more of my gluten-free  recipes here!

  Footer Signature
     

Tuesday, October 23, 2012

Apple Pie Pops Guest post...

Hi y'all!  Today I am over at my sweet, creative bloggy friend, Hilani's blog called Handmade by Hilani!  She's INCREDIBLY talented and super sweet, so I hope you all will go check her blog out!'She's was kind enough to allow me to guest post THESE babies over there today!

 So head on over to Handmade By Hilani and check out my tutorial for my Apple Pie pops! While you are over there, check out her store or her custom ordering tab in case you need something specific! She is so amazingly creative and her sweet Drink Sleeves are uber green and cool! :)

Thank you Hilani! Love you chick! She's my homegirl that isn't afraid of my ghetto inner wanna be thug! hahaha! Right, girl!?

xoxo
Evey

Wednesday, August 15, 2012

Guest Post from Design, Dining+Diapers: GF Chocolate Cookies with Salted PB Frosting!

Hello Sweet Song Bird readers! I am so excited to be visiting today. It is a huge honor to be here!
In case we've never met, I'm Taryn from Design, Dining + Diapers. A place where I share a little bit of everything but mainly craft tutorials, DIY home decor, and allergy friendly recipes! I live in the Pacific Northwest with my hubby, 16 month old Baby Girl and our spunky Golden Retriever! I love the outdoors, coffee, baking, spending time with friends and family and watching reality TV!
chocolate peanut butter cookies, gluten-free, peanut butter frosting

Today, I'm sharing my recipe for these Chocolate Cookies with Salted Peanut Butter Frosting! I made this recipe gluten-free/egg-free but you could easily make them 'regular' if you wanted to.

chocolate peanut butter cookies, gluten-free, peanut butter frosting

If you have a peanut allergy or want to keep them simple, the chocolate cookies are also yummy without the peanut butter frosting!

chocolate peanut butter cookies, gluten-free, peanut butter frosting

Mmm peanut butter and chocolate, one of the best flavor combos ever!

chocolate peanut butter cookies, gluten-free, peanut butter frosting

Just a pinch of sea salt was just the right touch to these cookies. I'm generally not a fan of salt, but I have to admit I'm glad I tried the salt because it created the perfect sweet and salty taste!

chocolate peanut butter cookies, gluten-free, peanut butter frosting

Enjoy!


Chocolate Cookies with Salted Peanut Butter Frosting

Recipe Type: Dessert
Author: Taryn
Prep time: 10 mins
Cook time: 12 mins
Total time: 22 mins
Serves: 36 cookies
A little bite of salty and sweet!
Ingredients
  • 1 1/2 cups flour (I use Bob's Red Mill Gluten-Free Flour Mix)
  • 1 cup cocoa powder
  • 2 eggs (I use Ener-G Egg Replacer)
  • 2 tsp baking powder
  • 1 tsp vanilla (If making GF, make sure you use pure vanilla)
  • 1 tsp salt
  • 1 cup white sugar
  • 1 cup packed brown sugar
  • 1/2 cup butter
  • 1/4 tsp Xanthan Gum (if making these GF)
  • 1 cup creamy peanut butter
  • 1/4 butter
  • 1/4 cup milk
  • 1 tsp vanilla
  • 2-3 cups confectioners sugar
  • 2 Tbsp of Salt for topping
Instructions
  1. Combine sugars, eggs, butter, and vanilla together and mix until smooth
  2. In a separate bowl, combine dry ingredients and slowly add them to the sugar/butter mixture
  3. Using an electric mixer, blend the two mixtures together until creamy
  4. Roll the dough into 1" rounds and place them on an ungreased cookie sheet
  5. Bake for 12-15 minutes
  6. To make the peanut butter frosting, using an electric mixer combine peanut butter, butter, milk, vanilla and confectioners sugar
  7. Depending on the consistency of your peanut butter you may need anywhere from 2-3 cups of confectioners sugar
  8. Keep adding sugar until the frosting is thick enough to stand on its own and sweet enough to your liking
  9. Once the cookies have cooled, frost the cookies with the peanut butter frosting and sprinkle a little sea salt on top for a sweet and salty taste!
( )
To view more projects, or if you just wanted to say hi, you can find me on my blog, Facebook, Pinterest, Google + and Twitter!

A huge thanks to Evelin for having me over today and it was so great to 'meet' all of you!

My Favorite things!

All content owned and created by

Evelin Alvarez-Flores

2009 © 2020


blog design by:
HTML Map